


 New Code Sent!

How to Install a Dishwasher in 8 Steps
Whether you’re replacing an old dishwasher or buying your first one, you can try to tackle the installation yourself with appropriate plumbing and electrical connections and a few pieces of equipment. Learn how to hook up a dishwasher with this step-by-step guide.
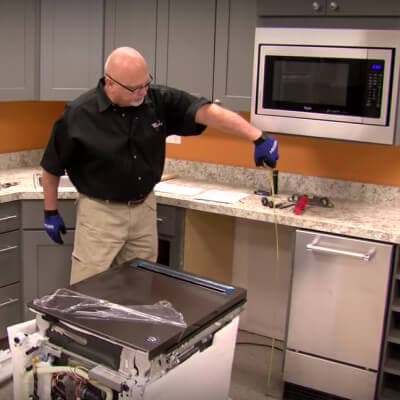
Watch this video and learn how to install a dishwasher from Maytag® appliance experts.


Dishwasher Installation Guide
Installing a dishwasher is a DIY project that can be done with a few tools, supplies and knowledge of plumbing and electrical connections. Always refer to your owner’s manual for specific instructions on how to install a dishwasher. It is recommended to consult a professional when dealing with any plumbing and electrical during any installation.
Tools for a Successful Installation
Parts included with your dishwasher
Cordless drill
Screwdrivers
Socket wrench
Adjustable wrench
Measuring tape
Level
Additional tools or supplies as listed in installation instructions
Accessories needed for Maytag® dishwashers
- Power cord (straight cord kit or right-angle cord kit)
Other Useful Supplies
Shallow pan or bucket
Utility knife
Bath towel or large piece of cardboard
Flashlight
Pliers
Step 1: Measure for the New Dishwasher
Before installing a new dishwasher, make sure to measure for accurate cabinet opening dimensions. First, measure the height, width and depth of the space where you intend to install your dishwasher to ensure a proper fit. Generally, you will want to leave 2 inches of clearance between the appliance and cabinet. Another good practice is to account for at least 27 inches of space in front of the dishwasher for ample room to open and close the door. If you are installing in a corner, make sure to also leave at least a 2 inch gap between the opened dishwasher door and any adjacent walls or cabinets.
Step 2: Uninstall the Current Dishwasher
Turn off electricity and water
Before you start the steps for replacing a dishwasher, turn off the electrical power at the fuse box or circuit breaker, then turn off the water supply. Once you’ve turned off the water and electricity, unplug the dishwasher and disconnect the drain hose and water supply lines. Use a towel, bucket or shallow pan to catch any water when you disconnect the drain hose.
How to uninstall a dishwasher
Remove the screws that anchor the dishwasher to the underside of the countertop or left and right cabinets. Use a screwdriver to remove the toe panel below the dishwasher door, then unscrew the leveling legs from each corner of the base. Place a bath towel or piece of cardboard in front of the dishwasher and have a friend help you carefully pull the old dishwasher onto it from the cabinet opening. Slide the old dishwasher out of the way.

Step 3: Prepare the New Dishwasher for Installation
Remove packaging
Cut the box along the dotted line all around the dishwasher base. Remove shipping materials from inside the box, setting aside any boards included in the box for use as shims inside the cabinet if needed. Open the dishwasher door and remove styrofoam pieces from the interior. With the help of a friend, carefully tilt the dishwasher on its back and remove the shipping base.
Prepare the dishwasher for installation
Remove the toe panel and, on newer Maytag® dishwashers, remove the drip tray, disconnect the drip sensor and set it aside for later. Then, route the power cord through the terminal box and connect the remaining wires as detailed in your installation instructions. Attach the drain hose to the drain port, then route it and the power cord underneath the rear legs of the dishwasher.

Save wood runners from packaging
If you need to build up floors underneath the dishwasher or fit it in a slightly wider cabinet, use the included wood runners as shims for a proper fit.
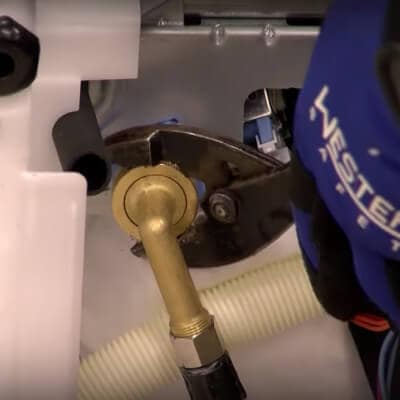
Step 4: Hook Up the Water Supply and Adjust Height
Attach the elbow hose fitting to the water supply line, then connect the fill hose to the valve on the bottom of the dishwasher and route it toward the rear of the dishwasher. Tighten by hand, then tighten an additional 1/4 to 1/2 turn using pliers.
Measure your cabinet opening from the floor to the underside of the countertop and adjust the rear leveling legs to match the height of your opening.
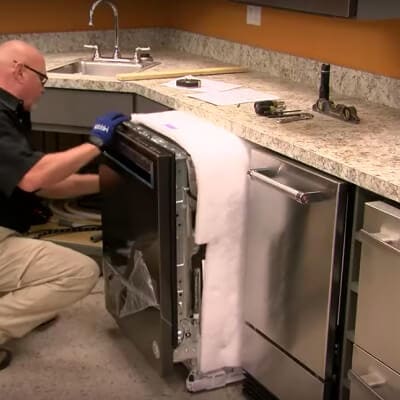
Step 5: Move the Dishwasher Into the Cabinet
Have a friend carefully help you stand the dishwasher upright and move it close to the cabinet opening. Route the power cord, water supply and drain hose through the hole on the side of the cabinet opening. Slide the dishwasher into the opening until it’s approximately 6 inches from the back.
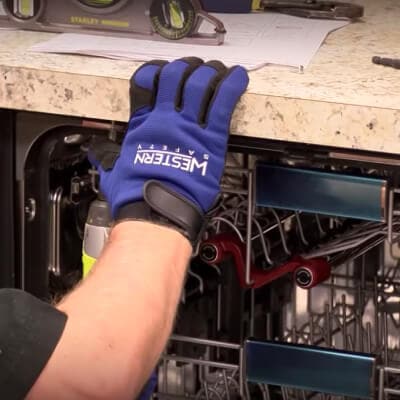
Step 6: Secure Your Dishwasher to the Countertop and Cabinets
Insert anchor brackets into the open slots on the left- and right-hand top of the dishwasher collar or into slots on each side of the dishwasher, then slide the dishwasher back until the door is flush with the front of the surrounding cabinet doors. Adjust the front leveling legs until the dishwasher is level, checking for levelness up and down the door and along the top edge. Then, screw in the anchor brackets.

Step 7: Connect Hoses to the Dishwasher
Attach the water supply line to the hot water line, then turn the manual shut-off valve to the on position. Connect the drain hose to the drain port. If connecting to a new drain disposal, make sure to knock out the disposal drain plug and remove it before connecting the dishwasher drain. If you have a Maytag® dishwasher, reconnect and return the drip tray toward the bottom of the dishwasher. Plug the power cord into an electrical outlet with a 120-volt,15- or 20-amp, fused electrical supply. Consult a licensed professional if you have questions about the electrical requirements.

Step 8: Power On and Run Test Cycle
See the dishwasher installation instructions for details on how to run a test cycle to check for leaks. Add insulation underneath the door, then reinstall the access panel and toe panel. Don’t forget to remove the protective film from the door and interior racks to properly show off your new, hardworking dishwasher.
Help keep water from backing up
Help avoid backwash from the sink’s drain by securing slack in the drain hose to the backside of the cabinet under the sink, making sure it arches higher than the drain inlet.


Dishwasher Installation Troubleshooting Tips
Problems installing your dishwasher? Here are some troubleshooting tips to help you get the job done.
Not draining: It is normal to see about 1 inch of standing water in the dishwasher tub, but if you notice excess accumulation, there may be a clog.
Not filling with water: If your dishwasher is not filling with water, the solution can be as simple as making sure the door is fully closed or ensuring the water supply valve is turned on.
Won’t start: If your dishwasher won’t start, ensure the circuit breaker is turned on, and check the settings for any standby modes or control locks. If it still won’t turn on, reset the appliance by unplugging it and plugging it back in.
- Dirty water: Dirty water on your dishes could be a sign of a faulty air gap, a part that connects the kitchen sink drain to your dishwasher and helps prevent backflow.
Dishwasher Installation Diagram PDF
For specific instructions on how to install a dishwasher, always refer to your owner’s manual. Use your specific model number to download installation guides and other useful resources to help you tackle installation, like this owner’s manual for a Maytag® undercounter stainless steel dishwasher.


Can I Install a New Dishwasher by Myself?
With the appropriate supplies and plumbing and electrical connections, you can install a dishwasher with the help of at least one other person. But, if you need extra assistance or have questions, always consult a professional when dealing with unfamiliar plumbing or electrical issues. Maytag brand also offers in-home delivery and professional installation for most major appliances.
How Hard is it to Install a Dishwasher?
The difficulty level of installing a dishwasher can depend on prior experience, existing plumbing and electrical connections and the installation location for your specific model. Always refer to your owner’s manual for installation instructions.
How Long Does It Take to Install a Dishwasher from Start to Finish?
If you’re comfortable tackling home projects yourself, you can likely replace your current dishwasher with a new one in two to four hours. For first-time dishwasher installation or hard-wiring, it’s recommended that electrical connections be made by a licensed electrical installer.
When Should You Turn to Professional Help?
For questions or concerns on plumbing and electrical connections, consult a professional for installation assistance. Maytag brand also offers dependable service and installation for your dishwasher and other major appliances.
Shop Maytag® dishwashers
Maytag® dishwashers help tackle stubborn food, grit and grime on your dishes. Explore select dishwashers with features like Dual Power Filtration that puts an end to pre-rinsing and scraping. Or, create more space to wash small glasses and bowls with a 3rd Level Rack, found on some models such as this dishwasher from Maytag brand.


Your subscription was successful
Thank you for signing up. Keep an eye on your inbox for our next newsletter.
Sign Up for More Insights to Stay Connected
Enjoy articles like this? Get helpful guides and appliance care tips sent straight to your inbox.
